Thursday, November 29, 2007

Yipes! Healing Mat wont HEAL!

Thought I'd get a head start in my studio this morning and started playing with my new spring loaded hole punch. WHAMMO! Great holes, but my poor little matt is now perforated! What should I have used instead!

LOOK!
IMG_4208.jpg IMG_4208.jpg picture by bouldercreekantiquesandart

Christmas ATC's

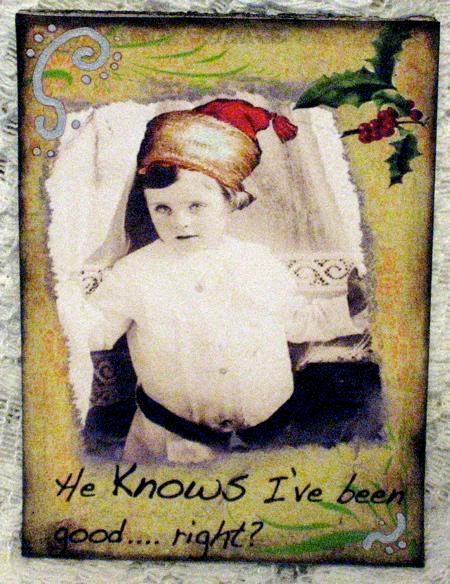
I've been sitting with my laptop at night while watching Dancing with the Stars and creating fun layouts with vintage images of Santa and some old Victorian Photographs. (Still trying to beef up my feedback on my new eBay seller id. so each of these are listed there.)

Here's what I've done:
I've mounted all these on matt board, using my favorite Diamond Glaze... made the atcs nice and kinda chunky... just one of those "feel good" (in your hands) kinda things...
IMG_4222.jpg IMG_4222.jpg picture by bouldercreekantiquesandart
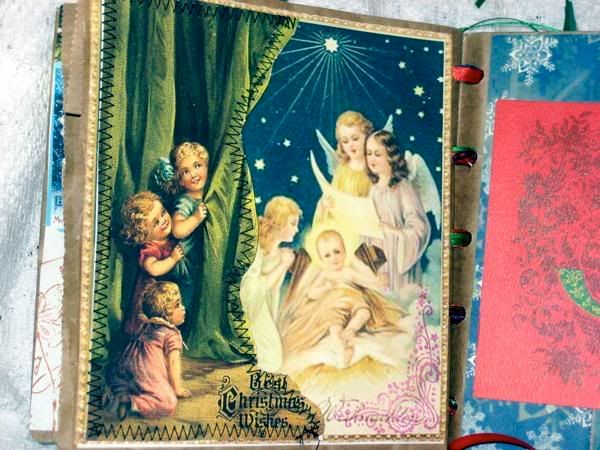
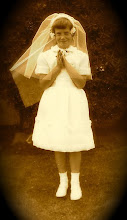
I just love this little girl, peering out from the windows, caught up in the curtains....
IMG_4218.jpg IMG_4218.jpg picture by bouldercreekantiquesandart
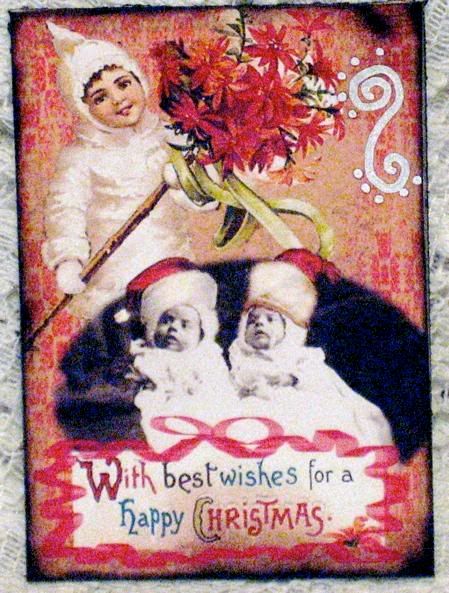
Adorable little twin babies... the photo was marked 1909. I had fun using photoshop brushes to make a grunged out background... I finished with using walnut inks on the sides and corners. Mounted all of them on matt board for strength. (I ran out of the bookboards I made! Hafta make more!)

IMG_4213.jpg IMG_4213.jpg picture by bouldercreekantiquesandart
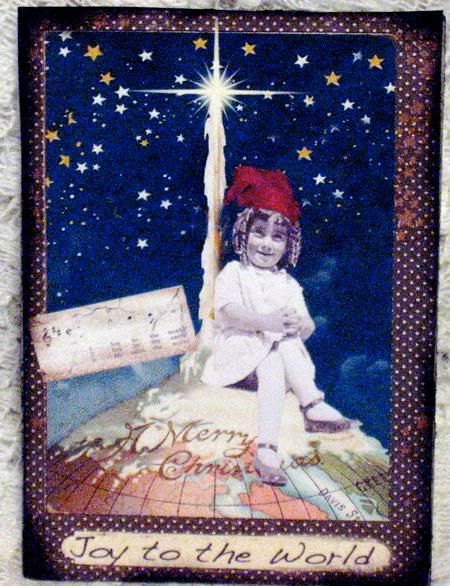
The photo of this little girl is also about 1909... she's sitting on her front porch... she's got attitude! I couldn't resist putting her on top of the world! I used three different Victorian images, cut out the middle of the dotted one, cut out Santa, who was standing on the North Pole, and lifted a Santa hat off another.... plus I grunged out a piece of music.... all digitally!

IMG_4209.jpg IMG_4209.jpg picture by bouldercreekantiquesandart
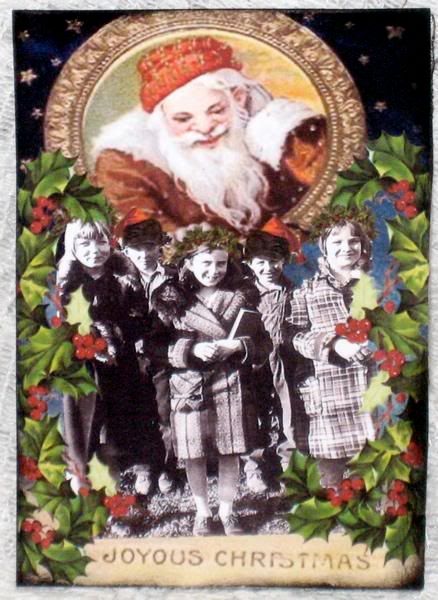
I love this group of friends.... all bundled up for the chill! I painstakingly cut out little garland hair wreaths for the girls and Santa hats for the boys.... but the hats got lost in the overall composition. I felt I needed to add the garlands on the sides to soften the cut off parts of the photo. The Santa was from a Victorian image and I plunked down the kids after cutting out the background on their photo.


IMG_4215.jpg IMG_4215.jpg picture by bouldercreekantiquesandart

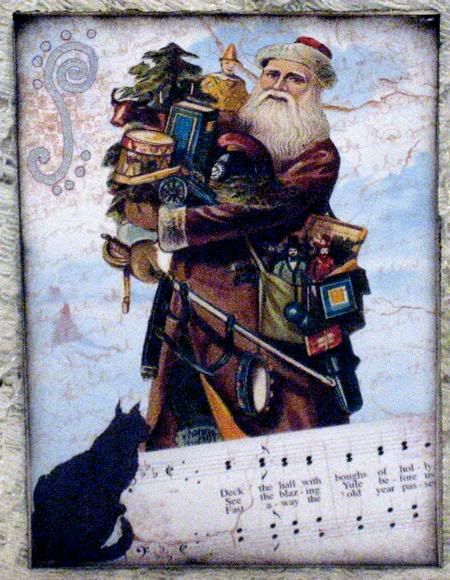
This shows one of the backgrounds I made using the grunge brushes... The little kitty was actually watching a fireplace in another picture.

IMG_4220.jpg IMG_4220.jpg picture by bouldercreekantiquesandart
I felt really good about this background! loved adding in the cracks, old script, etc.

IMG_4223.jpg IMG_4223.jpg picture by bouldercreekantiquesandart
The cool thing about photoshop is that you can alter the hue and saturation, and come up with an entirely new look!! So I've created several "backgrounds" to use for my atcs.... soo cool, who woulda thought!! (and I learned to type on an old manual clunker ~1960's~, then moved up in technology with the IBM selectric!... never dreamed about computers or doing what we can do now!!)

Have a FABULOUS, CREATIVE DAY!!
Hugs, Chris

Sunday, November 25, 2007

Finished up this week

Here are a few pieces I finished up this week. Currently listed on eBay! I just love that hot wax thing!!
IMG_4196.jpg IMG_4196.jpg picture by bouldercreekantiquesandart

IMG_4187.jpg IMG_4187.jpg picture by bouldercreekantiquesandart

IMG_4183.jpg IMG_4183.jpg picture by bouldercreekantiquesandart

IMG_4181.jpg IMG_4181.jpg picture by bouldercreekantiquesandart

Bookboards

Here is how I learned to make bookboard from vintage book pages.....

Owning an antiques and art store.... I come across many books that are just too worn out. I love to choose books that already have a natural age discoloration. There's something just so organic and soulful about using these ancient pages as a substrate for today's work. In the two examples I'll post, you will see the 1890's dictionary pages, and also Sear's catalog pages (a 1970's reprint).

For my work surface I like to use a large piece of heavily waxed paper. The runoff glue is easier to wipe off. I use a 50/50 mixture of Methyl Cellulose http://www.dickblick.com/zz127/36/ and PVA for the glue. I make a large batch (8 oz. at a time) of this and keep it in the fridge. I use a wide, 3" brush to evenly apply the glue.

I simply glue one page on top of the next, alternating the direction of the pages. The grain is usually up and down, so the next sheet is glued sideways, and so on. Depending on the size of the pages, I'll fold over the surplus paper, building an even density.

Once each sheet is glued to the next, I run an bone folder across both directions... the surplus glue seeps out and I wipe it off. After a while I learned to get just the right amount on with little seepage. For the altered bag book pages, I used 6-8 book pages. This gives just enough strength. Also, seems to be a good strength for ATCs. For thicker, even sturdier, more bookboard like pages, just keep adding them on.

To prevent warping, bending, rippling....
THE MOST IMPORTANT.... not to be overlooked step, is the drying and pressing time. Each page is placed on top of several layers of newsprint paper, and another two or so sheets on top of that. Then a large board that extends to the edges of your pages. On top of that, a heavy weight, the heavier the better. The newsprint will wick out the dampness and will need to be changed several times. I'll switch out the damp for fresh paper about once an hour, maybe three times... then let the finished pages sit overnight. This will make them really nice and stiff and smooth.

I imagine you could do the pressing/wicking process between adding/gluing sheets, but I tend to be impatient. For me, it's kinda like quilting or weaving.... bringing together materials to make something new and wonderful!

It's really easy! Here's a pic of the 1890's dictionary pages as a finished project in an altered album:

Notice how the natural aging looks. I love it!
Photo Sharing and Video Hosting at Photobucket
On the left below, you can see where I have folded the surplus paper back on itself, resulting in and interesting effect. Amazing, using dictionary pages, there are always some word/s that apply to the composition!
Photo Sharing and Video Hosting at Photobucket
Here are tags I made from the Sear's catalog. (These I inked to give the aged look to the edges. (FYI... the ribbons on these tags are actual lingerie ribbon from an ancient spool! so cool!)
Photo Sharing and Video Hosting at Photobucket
And these I cut down to ATC size. Fun stuff!
Photo Sharing and Video Hosting at Photobucket
So, that in a nutshell is how I make "bookboard". I'd love to get feedback from you, about this process, or how you make yours.

Thursday, November 22, 2007

THANKFULNESS on Thanksgiving

I woke early this morning and was going to get in some art time, before Brit and I start the Thanksgiving Day cooking.... somehow, I got hooked into looking at old family photos and was STRUCK by the meaning of this day! Tears of thankfulness wont stop! This is what it's all about.

Here we were, TEN years ago!


Photo Sharing and Video Hosting at Photobucket

And ten years later, this is the beautiful, confident, 15 year old, Brit, sipping on her Latte between classes at Cabrillo College!

Photo Sharing and Video Hosting at Photobucket

Yes, this is what Thankfulness is all about. Thank you God, for giving us this phenomenal opportunity to share in your wonderment! And God Bless anyone who happens upon this posting!

Wednesday, November 21, 2007

Mother Mary Collage Series

Photo Sharing and Video Hosting at Photobucket">Photo Sharing and Video Hosting at Photobucket" border="0" alt="" />

Mother Mary Series now listed on ebay

Here are a few of the Mother Mary altered art collages I'm now switching over to my eBay "redwoodmountainart" seller id.

Monday, November 19, 2007

It's been a GREAT MONDAY!

HOORAY! I did it, five hours later, I finally got my new eBay identity up and running:
"redwoodmountainart", EXCLUSIVELY for my original art work. I'm still learning how this blog thing works. Still don't have a clue how to directly link my ebay listings.


In the mean time....
Here's some of my first listing:
Photo Sharing and Video Hosting at Photobucket
This is the cover of this sweet little altered bag book album.... full of fun holiday images (collages) that I mostly created in photoshop.

Photo Sharing and Video Hosting at Photobucket
This little girl rises right out of the Christmas pie and reaches up to the Victorian family, to hang her stocking too!

Photo Sharing and Video Hosting at Photobucket
Some of the tags I made.

Just a few more pages....
Photo Sharing and Video Hosting at Photobucket

Photo Sharing and Video Hosting at Photobucket

Sunday, November 18, 2007

OK one year later!

Well at least I got it started! I moved on from doing Soul Collage cards and have finally got my studio in great shape! Been turning out lots of fun stuff... mixed in with lots of encaustics! I love the hot wax thing. So I hereby pledge... INTEND! to show off some of my work and build a network of like minded, creative souls.

Please let me know your thoughts on my art work. I live out here in the woods with my husband, granddaughter, two cats, a bird, and two dogs. Everyone always says "That's nice honey/grandma"...

This is the front of my latest altered book. The ladies woke me up at night to create their pages and statements.... I found allot of deeper meaning just wanting expression.
Photo Sharing and Video Hosting at Photobucket

Here are the first pages. I used Photoshop to create digital collages throughout this book. I love to make my own paper!
Photo Sharing and Video Hosting at Photobucket

Here are the next pages.... I played with a vintage catalog, then cut the ladies out, used encaustic medium to give them a sturdiness, then applied more wax to adhere them to the pages. Ended up covering some of my collage, but it all fit together.
Photo Sharing and Video Hosting at Photobucket

This collage created herself! I took one Victorian nude image of a woman looking into the mirror and created copies of that, lessened the opacity, and circled the images around the original. I could probably write pages in my journal about the feelings this image invokes.
Photo Sharing and Video Hosting at Photobucket

More fun pages.....
Photo Sharing and Video Hosting at Photobucket

Photo Sharing and Video Hosting at Photobucket

Photo Sharing and Video Hosting at Photobucket


I especially loved creating these images.... those poor Victorian women really had to suck it in! I think I might make some ATCs out of catalog ads.
Photo Sharing and Video Hosting at Photobucket

I wanted heavy cardstock, or bookboard weight paper to make these tags. I took a class at the Center for the Book in SF last month and learned how to make bookboard out of old book papers. So these pages are all from a 1890's French/English dictionary.. the pages were already distressed! Each card has a nice weighty feel to it since they are six to eight book pages thick. If anyone is interested, I'll be happy to post a "how to" make bookboard paper.
Photo Sharing and Video Hosting at Photobucket

I found two 1950's Milton Bradley domino sets at a garage sale and was going to list them on eBay.... BUT, had fun using them here instead! The silk ribbon I dyed using permanent inks from my stamping supplies. Loved the way the colors blended.
Photo Sharing and Video Hosting at Photobucket

This bevy of beauties turned out fabulous (if I say so myself). I played with the vintage images in Photoshop, created a white halo around each image, turned them all sepia, then coated them with wax. The wax makes them almost transparent.... I love the depth that encaustic creates.
Photo Sharing and Video Hosting at Photobucket

Finally.... since the bookboard pages were all too big for the album, I had some scraps left over to cut into 2x3 sizes for ATCs. I just love the feel of these!
Photo Sharing and Video Hosting at Photobucket
So, I'm thrilled to say that this creation of mine sold in less than one week on eBay! It's such a thrill to know that someone values your creation and that you have, maybe, touched their life in a small way.