Monday, December 10, 2007

Art Walk ~ EYE CANDY!

Oh my gosh.... I haven't posted in a week or so because I was getting ready for the Art Walk we had in our little town. Thought you'd all enjoy seeing some of the fabulous art! Sorry I didn't get pics of the 17 (!!) Bird Houses that one artist sold!

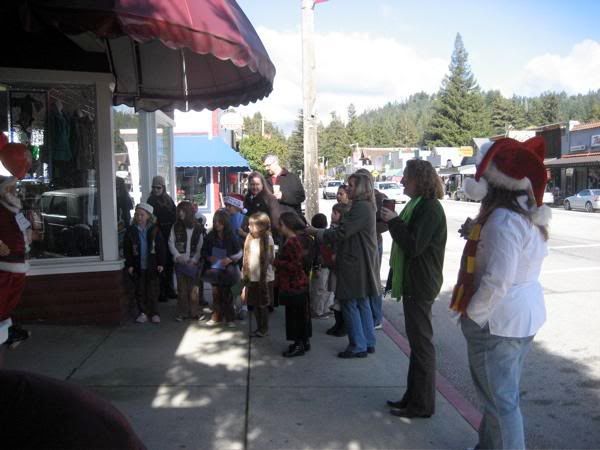
Here are some of the darling Brownies singing Christmas Carols in front of Sherrie's Fashions. My store is waaaay at the end of the block, you can see it in the distance. Actually, that big redwood tree is in our "Secret Garden" (back yard).
IMG_4271.jpg IMG_4271.jpg picture by bouldercreekantiquesandart

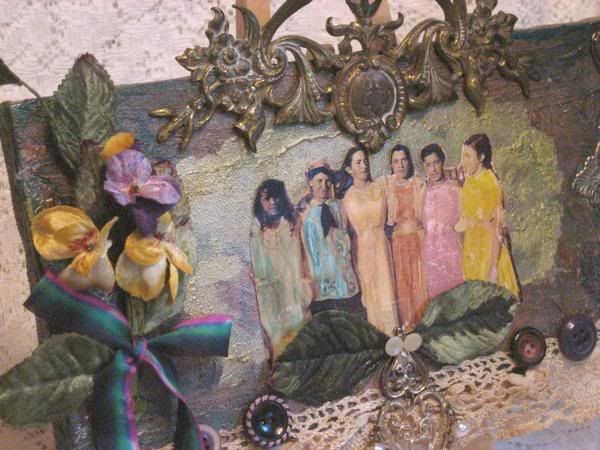
Carol makes these wonderful ceramic Tree ornaments every year. She has sold to the same people every year for the last 10 years.... they LOVE her "Boulder Creek" tree ornies! This year's is amazing! You can see them hanging.... shoulda took a closeup!!
IMG_4273.jpg IMG_4273.jpg picture by bouldercreekantiquesandart
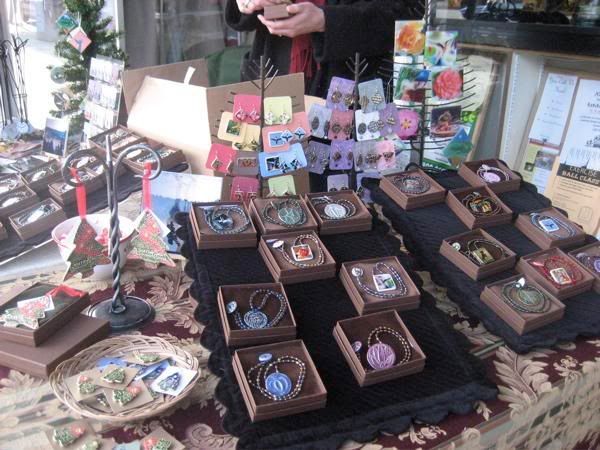
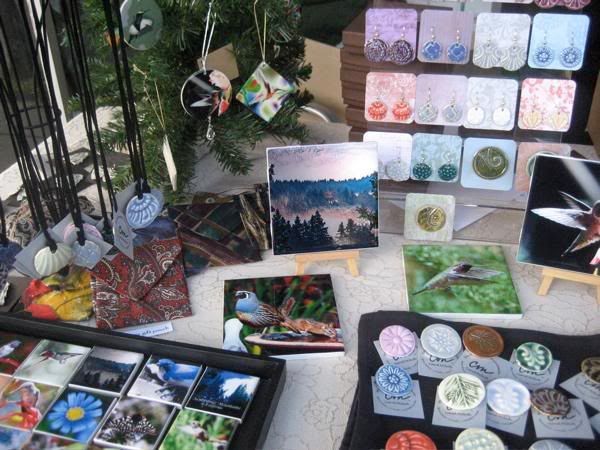
But wait... here's a closeup of some of her other works. She takes her husband's photographs and puts them on these little ornaments, jewelry, night lights, etc. I don't know HOW he can get the hummingbird wings to stop like that! I LOVE the one with the fog in the redwood trees... taken from their deck overlooking our little town!
IMG_4274.jpg IMG_4274.jpg picture by bouldercreekantiquesandart
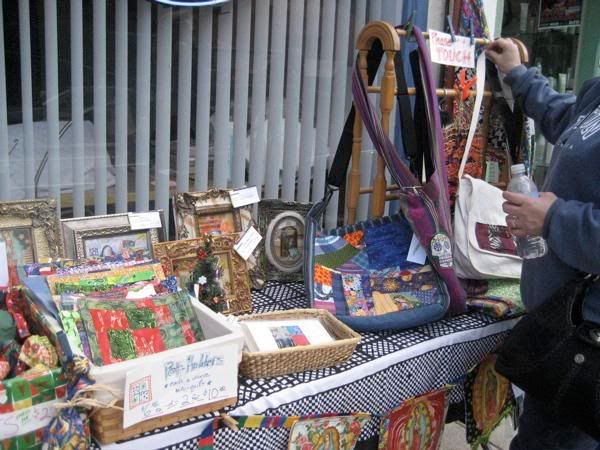
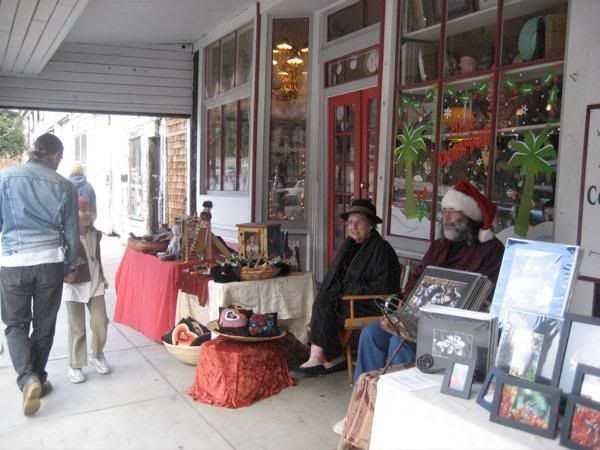
Here's my little space, in front of our shop window. I loved making those tiny domino tree ornaments. Have sold lots through the shop, so I hurried to make more for the Art Walk, but forgot them at home!! Didn't quite sell out though, so they're in the shop now.
IMG_4275.jpg IMG_4275.jpg picture by bouldercreekantiquesandart
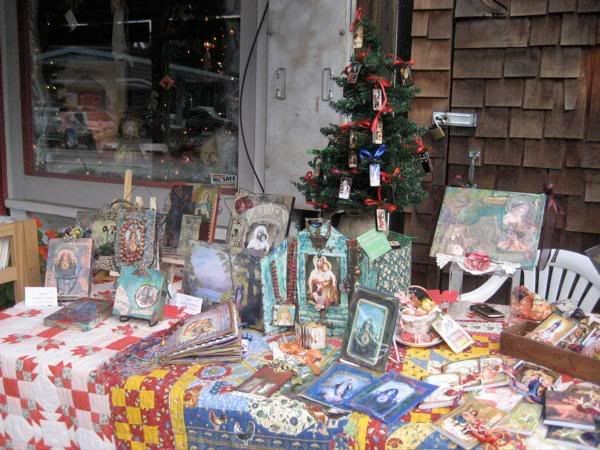
I didn't get a very good shot of Ruth's LOVELY VIRGIN MARY art! Ruth was so excited... she sold three of her fabulous "Hippie" blankets!
IMG_4276.jpg IMG_4276.jpg picture by bouldercreekantiquesandart
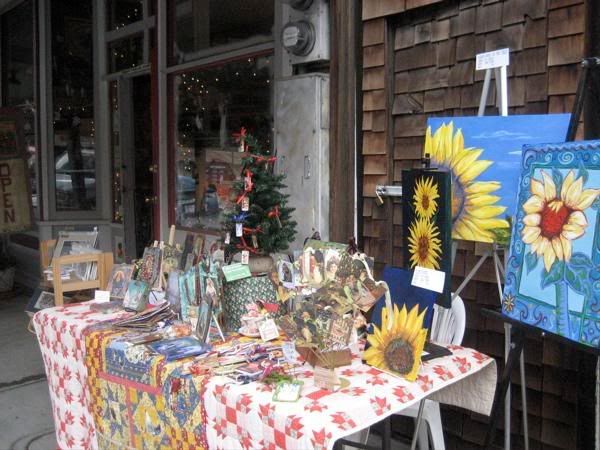
Here's another shot of my table including my sunflower paintings. got lots of compliments, but no sales. Would these sell on eBay you think?
IMG_4277.jpg IMG_4277.jpg picture by bouldercreekantiquesandart
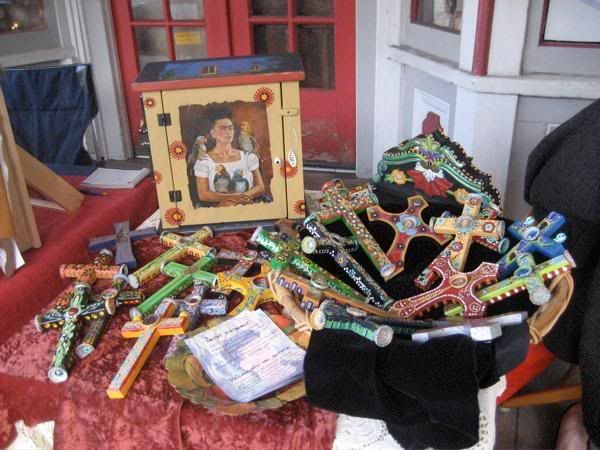
Here's Mike (Carol ~the ceramic ornament artist~ 's husband. His photos are out of this world! Next to him is Ginger.... wait till you see the closeups of her amazing work!
IMG_4278.jpg IMG_4278.jpg picture by bouldercreekantiquesandart
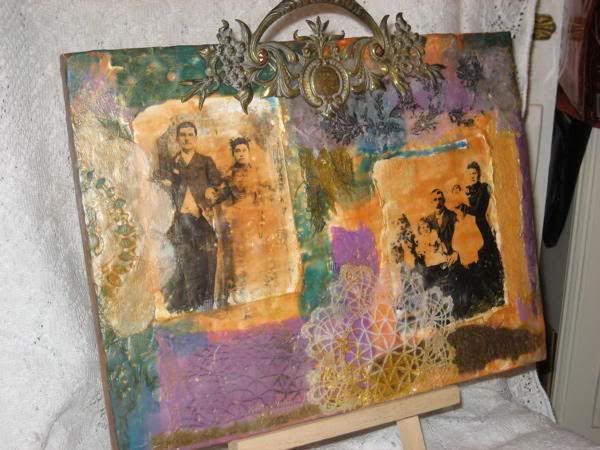
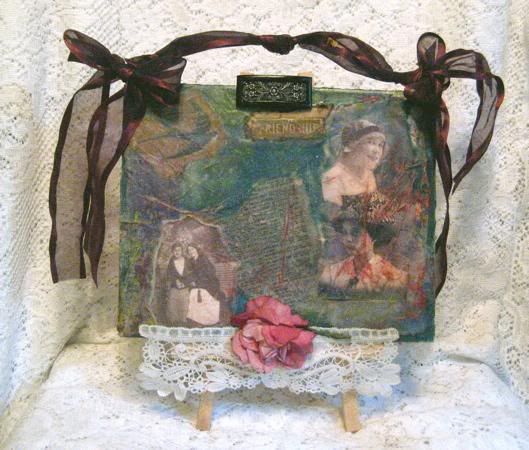
As promised.... here's Ginger's work! words don't do justice! her colors, textures, creativity! all AMAZING!!
IMG_4279.jpg IMG_4279.jpg picture by bouldercreekantiquesandart
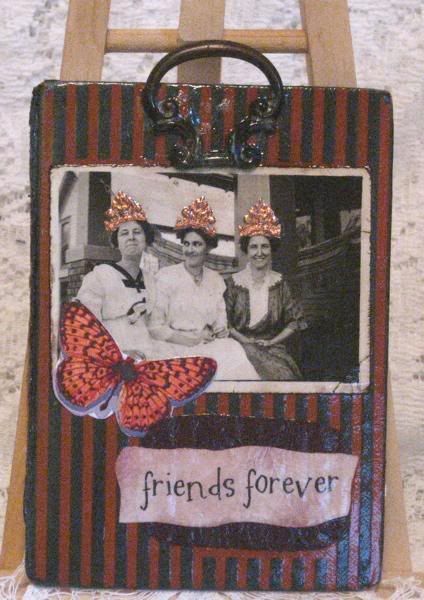
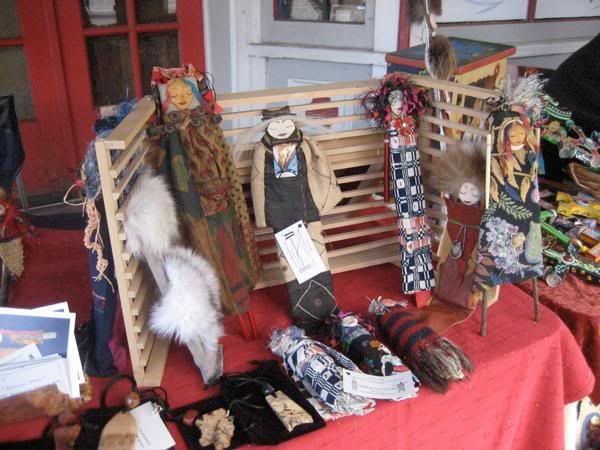
Donna Lee's Dolls, shared a table/space with Ginger... her imagination and creativity with her unique dolls has made her a local favorite. I'm always keeping a lookout for unusual brushes or unique things for her to incorporate into one of these charming characters.
IMG_4280.jpg IMG_4280.jpg picture by bouldercreekantiquesandart
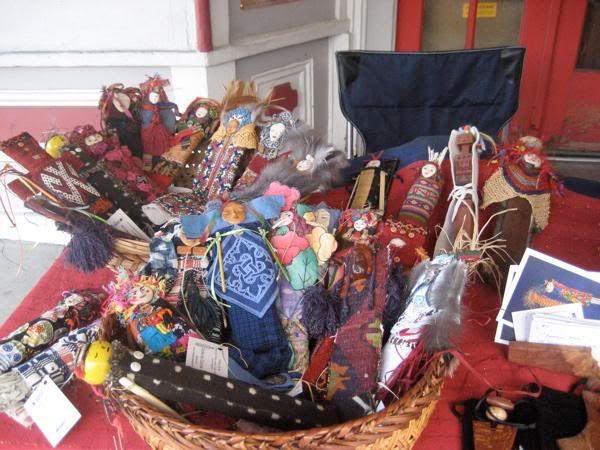
Here's better pics! I love the little sage bundles, they smell soo GOOD!
IMG_4281.jpg IMG_4281.jpg picture by bouldercreekantiquesandart
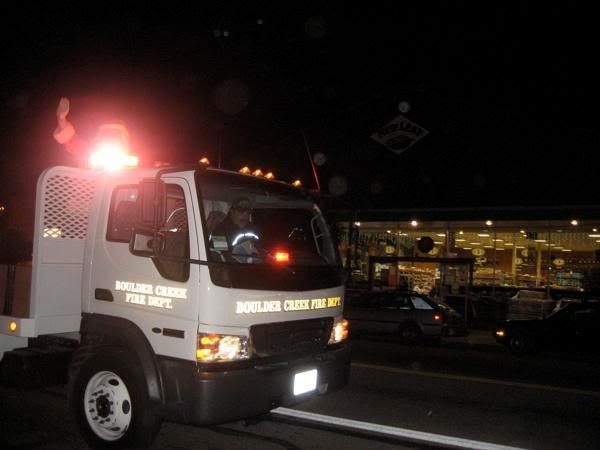
I just wish I had taken more pictures!! Everyone was bundled up... but having a ball! Then, at six pm, the fire engines came rolling into town, sirens blaring, announcing the arrival of our OWN SANTA! Santa then proceeded to light our huge Christmas tree. (Honestly, I wasn't asleep... I just forgot to take a pic of the tree! I'll get one later this week.) The fire department hosted a HUGE spaghetti feed. They are a volunteer department, and brother!! WE REALLY APPRECIATE THEM!! Thanks Guys, for all you contribute to our saftety here in the mountains!
IMG_4283.jpg IMG_4283.jpg picture by bouldercreekantiquesandart
Several hundred parents and children sang, laughed and cheered on Santa!

I love living in our little town!
Holiday Blessings to you all!

Sunday, December 02, 2007

Angels for the Christmas Season!

Here's a peek at my latest, just out of the art room, creation:

"Angel Mine"
An Angelic Victorian Christmas Book
A One of a Kind, Altered Art Paper Bag Album
All the papers have been digitally created uniquely using Photoshop.

IMG_4228.jpg IMG_4228.jpg picture by bouldercreekantiquesandart
Front cover with fibers, trims, silk ribbons
IMG_4230.jpg IMG_4230.jpg picture by bouldercreekantiquesandart
Close up


IMG_4232.jpg IMG_4232.jpg picture by bouldercreekantiquesandart
Inside pages 2-3
I digitally altered the inside steps of a church, then reproduced the inner arch
and put the entire original picture within the arch. The angel is from a picture of a stone angel.
IMG_4233.jpg IMG_4233.jpg picture by bouldercreekantiquesandartIMG_4234.jpg IMG_4234.jpg picture by bouldercreekantiquesandart

Pages 4-5
This is a really deep, purplish blude. A picture of church windows, digitally altered, grunge brushes and more layered in for depth. Angels floating around are from Victorian Postcards.IMG_4235.jpg IMG_4235.jpg picture by bouldercreekantiquesandart
Upper right, tied with a hand dyed silk ribbon are several of the
encaustic tags, also hung with silk ribbons.
IMG_4237.jpg IMG_4237.jpg picture by bouldercreekantiquesandart
Seen without the tags. Butterfly is hand dyed.


IMG_4238.jpg IMG_4238.jpg picture by bouldercreekantiquesandart
Pages 6-7
A beautiful angel (from a cemetary), digitally altered with grunge brushes,
writing, and more. Trimmed with flowered ribbon, small tags are attached.


IMG_4239.jpg IMG_4239.jpg picture by bouldercreekantiquesandart
Page 8-9
More digitally altered papers/pages, trimmed with vintage hand tatted trimming.
Tucked inside the left page is a surprise you'll see later.


IMG_4240.jpg IMG_4240.jpg picture by bouldercreekantiquesandart
Pages 10-11
I loved the texture of the cover paper so much I included it inside as well. Digitally created with lacy layers and a sweet angel peeking through.
The right side is a pocket with two vintage silk roses tied with a hand dyed silk ribbon. Both are removable.
IMG_4241.jpg IMG_4241.jpg picture by bouldercreekantiquesandart


Page 12-13 Below...
These were actually the first digital pages I created using angels. The color of
the graphics is vivid and sweet. I didn't want to add anymore, but the large vintage silk flower on the upper left just looked like it was made for this page.IMG_4242.jpg IMG_4242.jpg picture by bouldercreekantiquesandartIMG_4243.jpg IMG_4243.jpg picture by bouldercreekantiquesandart


Pages 14-16
More fun papers created with wonderful grunge and lace photoshop brushes.
Vintage tatted trip and a crochet rose adorn this pocket, which is holding two of the encaustic Angel Tags.
IMG_4244.jpg IMG_4244.jpg picture by bouldercreekantiquesandart

And here is the back of the book.
IMG_4245.jpg IMG_4245.jpg picture by bouldercreekantiquesandart
These are a few little extra angel cards with wonderful thoughts.IMG_4246.jpg IMG_4246.jpg picture by bouldercreekantiquesandart

Tucked into one of the pockets you will find this altered book cover, ready to hang or display. Made from a 1895 prayer book,
it still has the owner's thoughts clearly written!
IMG_4247.jpg IMG_4247.jpg picture by bouldercreekantiquesandartIMG_4249.jpg IMG_4249.jpg picture by bouldercreekantiquesandart

AND... here' another little surprise for you!
Wrapped in a vintage doily, tied with a silk ribbon
IMG_4250.jpg IMG_4250.jpg picture by bouldercreekantiquesandart
It's a little folding book! "The Lord's Prayer" with ten sweet angelic faces!IMG_4252.jpg IMG_4252.jpg picture by bouldercreekantiquesandart
For the TWELVE DAYS OF CHRISTMAS....
These are the twelve encaustic (made with hot wax) tags, or cards, each tied with a silk ribbon.IMG_4254.jpg IMG_4254.jpg picture by bouldercreekantiquesandart
I truly loved making this sweet little book
ANGEL MINE
I hope it will bring you an experience of inner peace, joy, and love.

Thursday, November 29, 2007

Yipes! Healing Mat wont HEAL!

Thought I'd get a head start in my studio this morning and started playing with my new spring loaded hole punch. WHAMMO! Great holes, but my poor little matt is now perforated! What should I have used instead!

LOOK!
IMG_4208.jpg IMG_4208.jpg picture by bouldercreekantiquesandart

Christmas ATC's

I've been sitting with my laptop at night while watching Dancing with the Stars and creating fun layouts with vintage images of Santa and some old Victorian Photographs. (Still trying to beef up my feedback on my new eBay seller id. so each of these are listed there.)

Here's what I've done:
I've mounted all these on matt board, using my favorite Diamond Glaze... made the atcs nice and kinda chunky... just one of those "feel good" (in your hands) kinda things...
IMG_4222.jpg IMG_4222.jpg picture by bouldercreekantiquesandart
I just love this little girl, peering out from the windows, caught up in the curtains....
IMG_4218.jpg IMG_4218.jpg picture by bouldercreekantiquesandart
Adorable little twin babies... the photo was marked 1909. I had fun using photoshop brushes to make a grunged out background... I finished with using walnut inks on the sides and corners. Mounted all of them on matt board for strength. (I ran out of the bookboards I made! Hafta make more!)

IMG_4213.jpg IMG_4213.jpg picture by bouldercreekantiquesandart
The photo of this little girl is also about 1909... she's sitting on her front porch... she's got attitude! I couldn't resist putting her on top of the world! I used three different Victorian images, cut out the middle of the dotted one, cut out Santa, who was standing on the North Pole, and lifted a Santa hat off another.... plus I grunged out a piece of music.... all digitally!

IMG_4209.jpg IMG_4209.jpg picture by bouldercreekantiquesandart
I love this group of friends.... all bundled up for the chill! I painstakingly cut out little garland hair wreaths for the girls and Santa hats for the boys.... but the hats got lost in the overall composition. I felt I needed to add the garlands on the sides to soften the cut off parts of the photo. The Santa was from a Victorian image and I plunked down the kids after cutting out the background on their photo.


IMG_4215.jpg IMG_4215.jpg picture by bouldercreekantiquesandart

This shows one of the backgrounds I made using the grunge brushes... The little kitty was actually watching a fireplace in another picture.

IMG_4220.jpg IMG_4220.jpg picture by bouldercreekantiquesandart
I felt really good about this background! loved adding in the cracks, old script, etc.

IMG_4223.jpg IMG_4223.jpg picture by bouldercreekantiquesandart
The cool thing about photoshop is that you can alter the hue and saturation, and come up with an entirely new look!! So I've created several "backgrounds" to use for my atcs.... soo cool, who woulda thought!! (and I learned to type on an old manual clunker ~1960's~, then moved up in technology with the IBM selectric!... never dreamed about computers or doing what we can do now!!)

Have a FABULOUS, CREATIVE DAY!!
Hugs, Chris

Sunday, November 25, 2007

Finished up this week

Here are a few pieces I finished up this week. Currently listed on eBay! I just love that hot wax thing!!
IMG_4196.jpg IMG_4196.jpg picture by bouldercreekantiquesandart

IMG_4187.jpg IMG_4187.jpg picture by bouldercreekantiquesandart

IMG_4183.jpg IMG_4183.jpg picture by bouldercreekantiquesandart

IMG_4181.jpg IMG_4181.jpg picture by bouldercreekantiquesandart

Bookboards

Here is how I learned to make bookboard from vintage book pages.....

Owning an antiques and art store.... I come across many books that are just too worn out. I love to choose books that already have a natural age discoloration. There's something just so organic and soulful about using these ancient pages as a substrate for today's work. In the two examples I'll post, you will see the 1890's dictionary pages, and also Sear's catalog pages (a 1970's reprint).

For my work surface I like to use a large piece of heavily waxed paper. The runoff glue is easier to wipe off. I use a 50/50 mixture of Methyl Cellulose http://www.dickblick.com/zz127/36/ and PVA for the glue. I make a large batch (8 oz. at a time) of this and keep it in the fridge. I use a wide, 3" brush to evenly apply the glue.

I simply glue one page on top of the next, alternating the direction of the pages. The grain is usually up and down, so the next sheet is glued sideways, and so on. Depending on the size of the pages, I'll fold over the surplus paper, building an even density.

Once each sheet is glued to the next, I run an bone folder across both directions... the surplus glue seeps out and I wipe it off. After a while I learned to get just the right amount on with little seepage. For the altered bag book pages, I used 6-8 book pages. This gives just enough strength. Also, seems to be a good strength for ATCs. For thicker, even sturdier, more bookboard like pages, just keep adding them on.

To prevent warping, bending, rippling....
THE MOST IMPORTANT.... not to be overlooked step, is the drying and pressing time. Each page is placed on top of several layers of newsprint paper, and another two or so sheets on top of that. Then a large board that extends to the edges of your pages. On top of that, a heavy weight, the heavier the better. The newsprint will wick out the dampness and will need to be changed several times. I'll switch out the damp for fresh paper about once an hour, maybe three times... then let the finished pages sit overnight. This will make them really nice and stiff and smooth.

I imagine you could do the pressing/wicking process between adding/gluing sheets, but I tend to be impatient. For me, it's kinda like quilting or weaving.... bringing together materials to make something new and wonderful!

It's really easy! Here's a pic of the 1890's dictionary pages as a finished project in an altered album:

Notice how the natural aging looks. I love it!
Photo Sharing and Video Hosting at Photobucket
On the left below, you can see where I have folded the surplus paper back on itself, resulting in and interesting effect. Amazing, using dictionary pages, there are always some word/s that apply to the composition!
Photo Sharing and Video Hosting at Photobucket
Here are tags I made from the Sear's catalog. (These I inked to give the aged look to the edges. (FYI... the ribbons on these tags are actual lingerie ribbon from an ancient spool! so cool!)
Photo Sharing and Video Hosting at Photobucket
And these I cut down to ATC size. Fun stuff!
Photo Sharing and Video Hosting at Photobucket
So, that in a nutshell is how I make "bookboard". I'd love to get feedback from you, about this process, or how you make yours.